How to repair leaking seams, joints, and flashing on a copper roof.
Repairing a leaking copper flat-lock roofing seam.
This guide focuses on repairing a copper roof on a Frank Lloyd Wright Usonian-style house located near Cleveland, Ohio. The home features a lower-slope roof that aligns with Wright's architectural style. Originally, the roofing was made of painted tin sheet metal. However, as that began to rust and leak, a new copper sheet metal roof was installed over the existing tin.
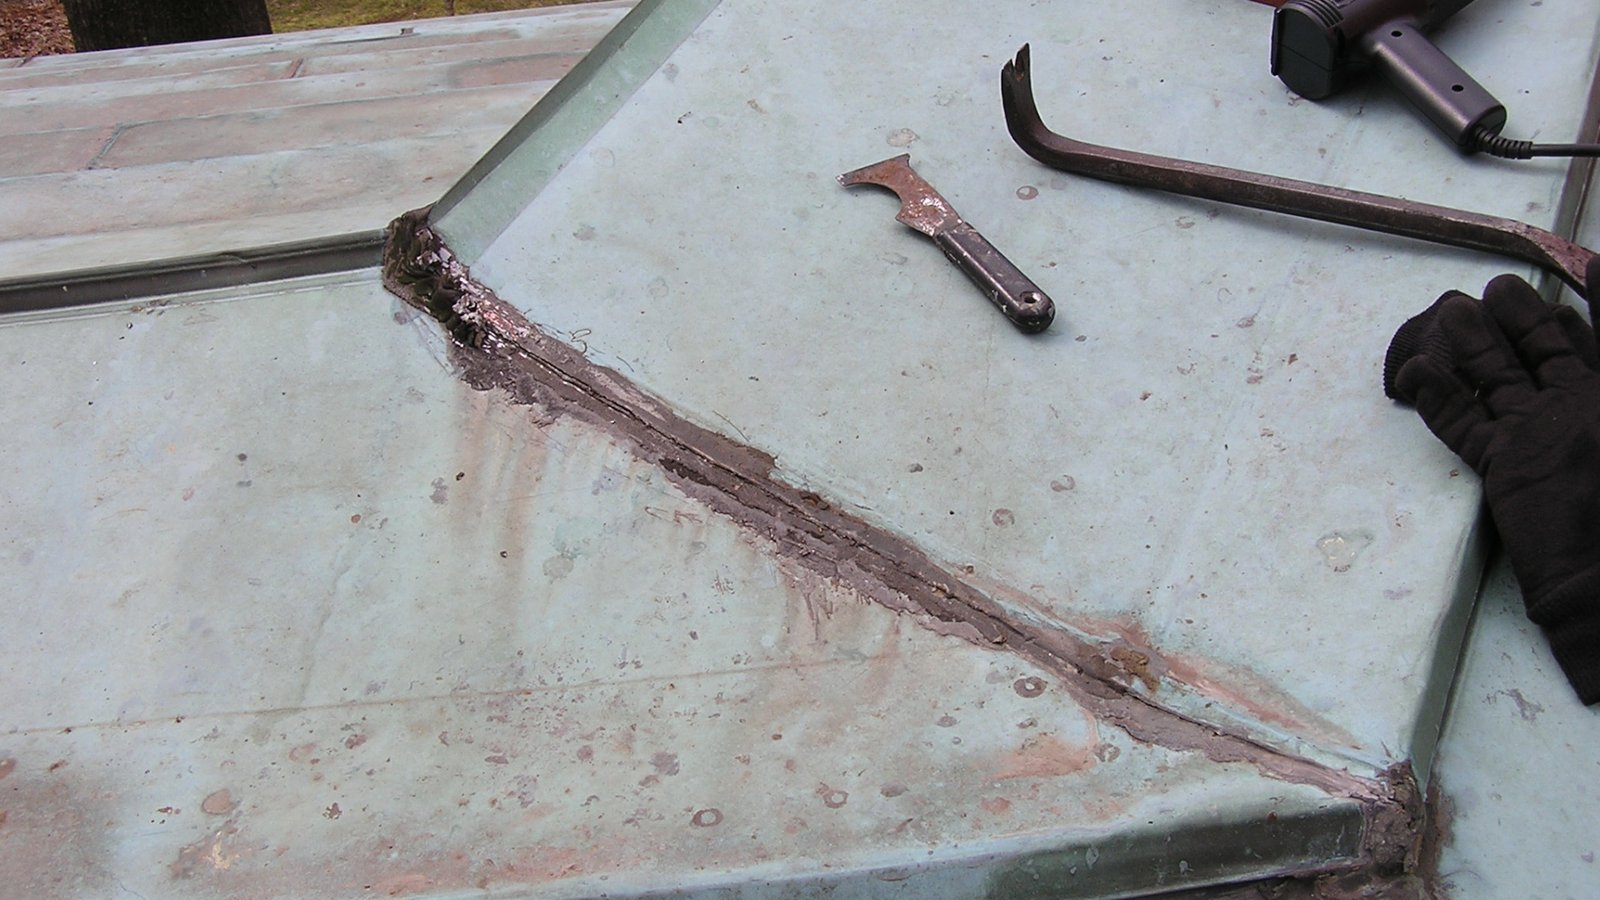
Due to the complicated design, the contractors who replaced the roof faced challenges in installing the new copper correctly. The seams and joints were improperly fitted and soldered, leading to leaks shortly after installation. Subsequent attempts to seal the leaks involved multiple applications of caulk and tar. Our goal was to identify the most problematic areas and repair them properly.
To begin the repair, we removed the layers of caulk and tar from the exterior of the seams using scrapers and utility knives. Next, we used soldering irons to heat and melt the existing solder, scraping it away from the joints. This was easier in sections where the solder was only applied along the edges of the seams.
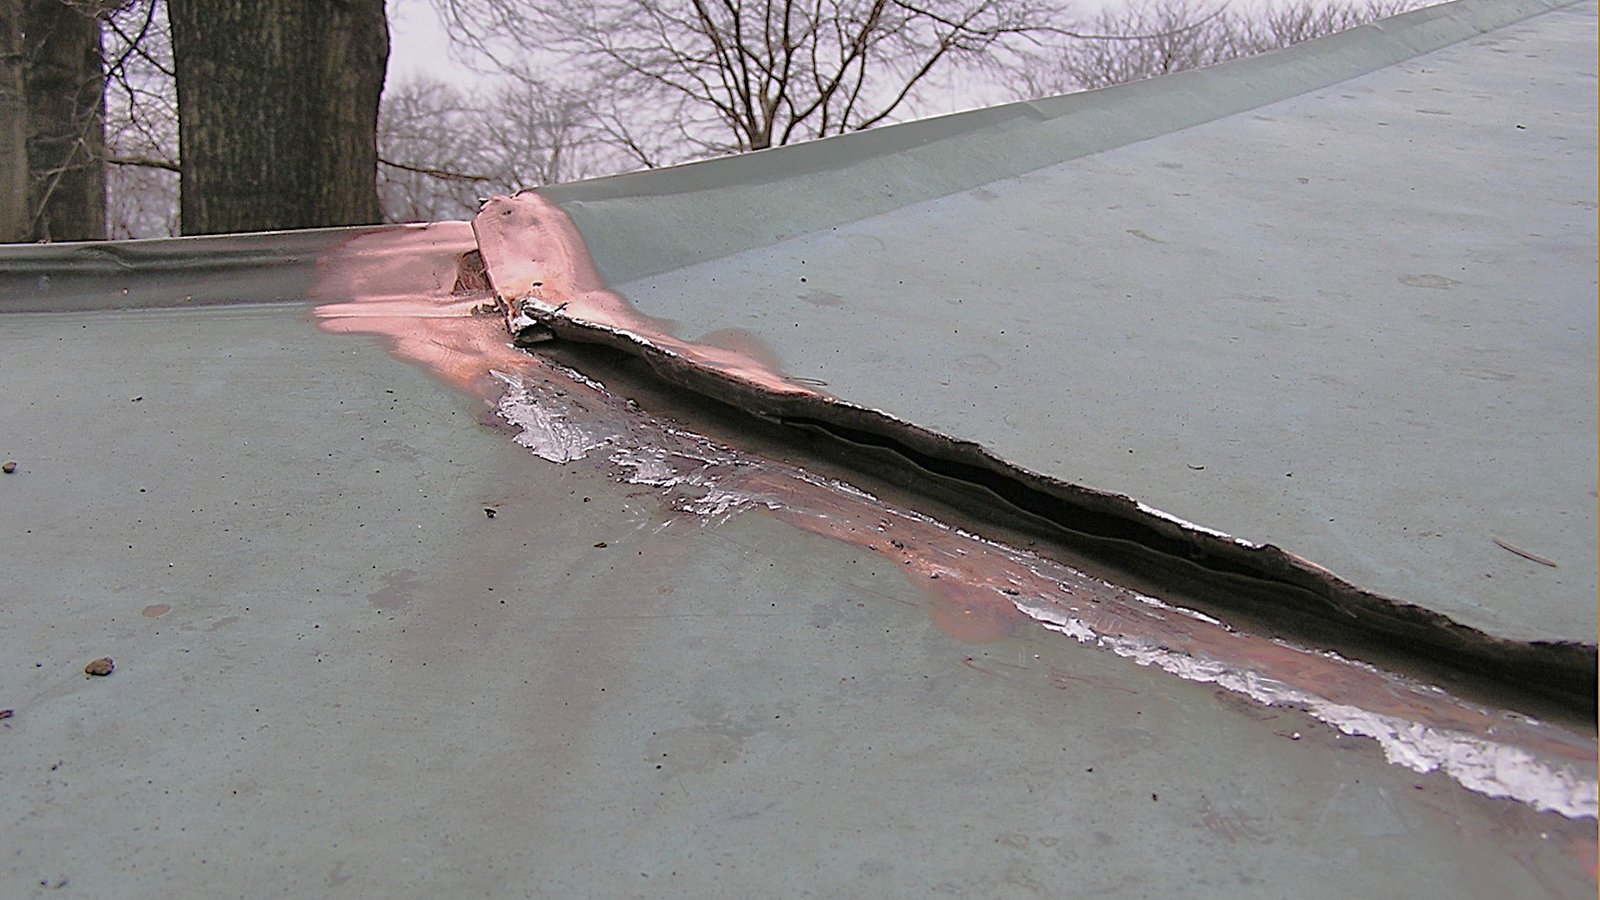
We carefully worked our way along the seams, prying them open with pry bars and hand tools. We then fully opened the seams with hand seamers, taking care not to stress or crack the copper. Any thick layers of solder were melted out of the seams during this process. 
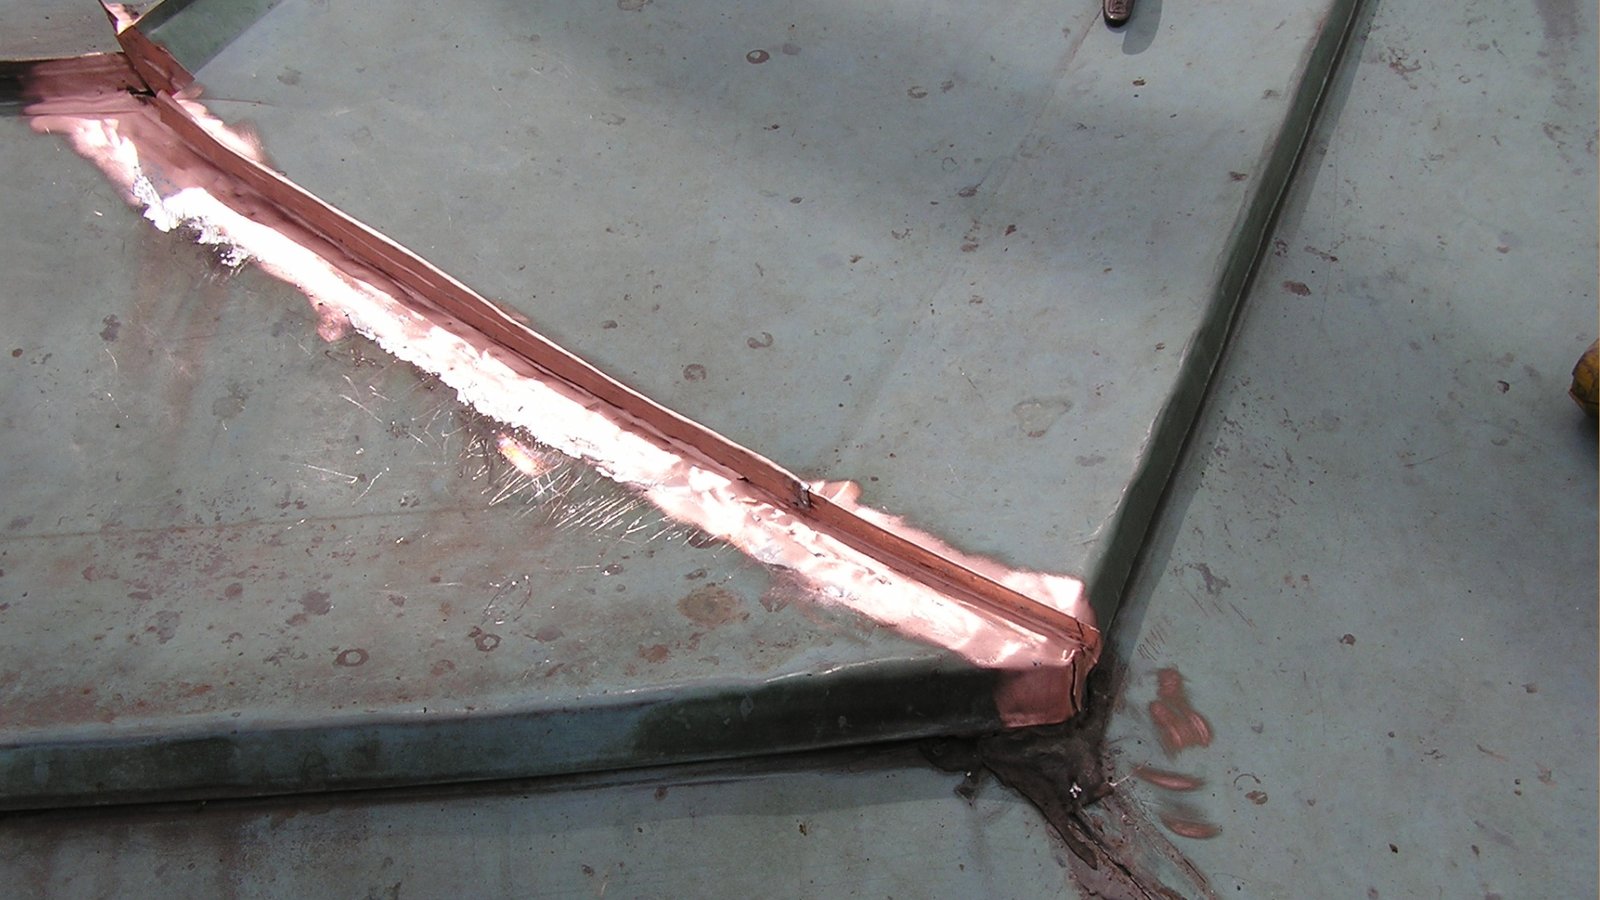
Once the joints were open, we mechanically cleaned them to remove any remaining solder, flux, corrosion, and oxidation. The copper sheets were then re-cut and appropriately fitted to create tight joints. A thin layer of soldering flux was applied, and the newly cleaned copper was tinned with a thin layer of solder. We made a patch to cover a misplaced cut from the original installation and soldered it in place. 
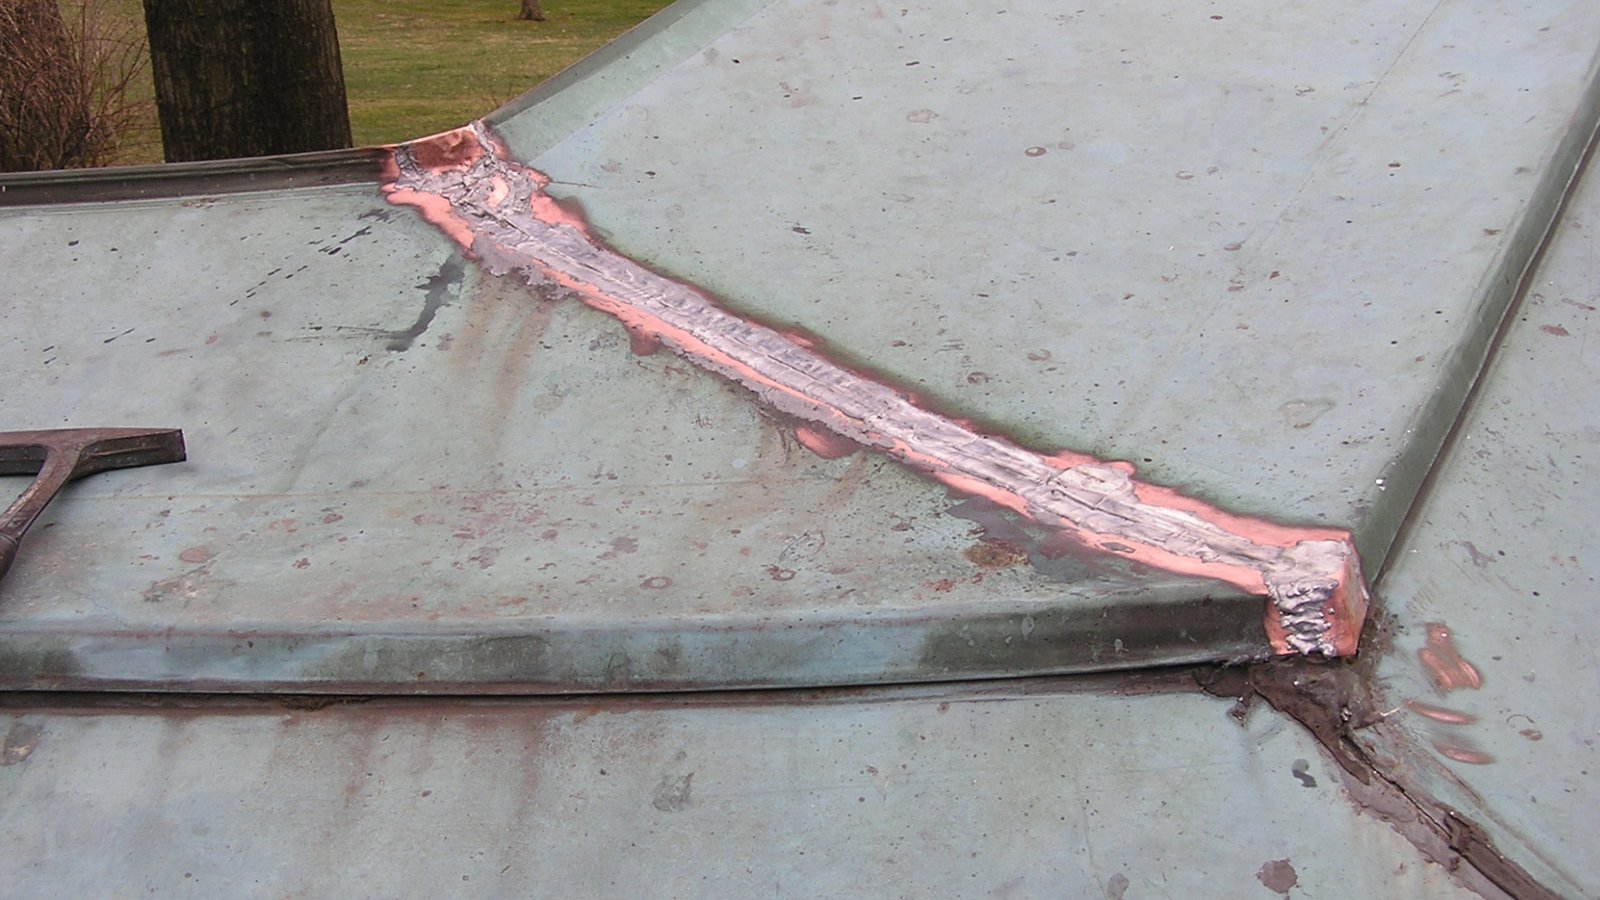
The joint was then carefully flattened back into its correct position and soldered together slowly, ensuring that the solder wicks fully into the joint. Finally, we cleaned the area with warm water to remove any remaining flux from the joint.
🔧 Copper Roof Repair (Soldered Patch or Seam) – Checklist
Tools & Materials
- Sheet copper (same thickness as existing metal)
- Tin snips/aviation snips
- Paint scraper
- Wire hand brush, wire wheel and electric drill, abrasive pad
- Flux (non-corrosive, for copper). For more pitted areas, use an acid-based flux.
- 50/50 lead/tin solder (roofing grade)
- Electric or controlled gas-heated soldering iron
- Damp cloth
- Leather gloves and safety glasses
Steps
- Prepare the Area
- Clear away debris, old sealant, or tar.
- Use snips to cut out damaged copper if replacing, or just clean around the defect if patching.
- Mechanically clean (roof area and patch piece) with a wire brush until the area is shiny copper.
- Clear away debris, old sealant, or tar.
- Cut & Fit Patch (if needed)
- Cut a copper patch about 1/2" larger all around than the hole.
- Test-fit to make sure it lies flat without buckling.
- Cut a copper patch about 1/2" larger all around than the hole.
- Apply Flux
- Brush a thin, even coat of flux on both the roof copper and patch edges (or on both sides of the seam you’re re-doing).
- Flux prevents oxidation and helps solder flow smoothly.
- Brush a thin, even coat of flux on both the roof copper and patch edges (or on both sides of the seam you’re re-doing).
- Pre-Tin Surfaces
- Heat the copper gently with the iron until the flux bubbles.
- Touch the solder to the copper and drag the solder along the surface.
- Allow a thin “tinned” layer to form on all surfaces.
- Heat the copper gently with the iron until the flux bubbles.
- Position & Heat
- Place the patch in position.
- Heat the solder gradually around the edges until it melts and flows, bonding the patch to the roof.
- For seams, heat along the joint and slowly feed solder so it wicks into the fold.
- Place the patch in position.
- Work in Small Sections
- Move the soldering iron steadily, avoiding puddling the solder.
- Move the soldering iron steadily, avoiding puddling the solder.
- Cool & Clean
- Let the joint cool naturally.
- Clean with warm water and a damp cloth to remove flux residue. Baking soda can be added to neutralize remaining flux.
- Inspect: solder line should be shiny, continuous, and have no gaps.
- Let the joint cool naturally.
If possible, inspect from both sides to confirm solder has flowed through the seam.
👉 Looking for professional copper roof repair in Cleveland, Shaker Heights, Lakewood, or Northeast Ohio?
Contact DM Crookshanks Construction (DMCroof.com) today for a free estimate. Our team has over 35 years of experience specializing in copper and slate roof restoration, copper roof repair, and historic home preservation.