Slate Roof Repair in Cleveland Hts., Ohio
A step-by-step account of a slate roof dormer flashing repair in Cleveland Heights, Ohio.
This large brick home, built sometime around the early 1900s, was leaking on both sides of the third-floor dormer. There were signs that the area had leaked before, as there was a bit of plaster repair and repainting on the walls and ceiling.

Before - Existing cement tar roof repair of slate roof and dormer flashing. This area of the roof has been repaired before. More than once. Notice the repairs to the window sill and the missing corner trim. The tar that was applied to the dormer corner flashing has dried out ( it does not take long ) and has pulled loose from the slate roofing. This is a common example of a repair performed by a roofer unwilling or unable to do the job right. It will usually do more harm than good.

Missing dormer flashing.
Roofing flashing? The left side of the roof dormer. The gap between the roof and dormer is where the shingle step flashing should be. The old steel roof flashing has rusted away, and the roof caulking from a previous repair has fallen out. This happens when caulking or tar is smeared over metal flashings. The tar will dry out and loosen, allowing moisture to become trapped under the tar against the metal. Causing the metal to rust away until the leak is worse than before.

Remove any existing roofing cement or caulking repairs.
A couple of layers of roofing cement have been scraped off the roof and dormer slate. Care must be taken to avoid breaking any of the roofing slate when removing the tar. Often it is easier to remove very old, dried-out roof cement as it has started to peel away from the slate. Newer roof cement is still pliable and will smear further onto the surrounding slate. Either way, it is hard to get all the roof cement off the slate completely.

Carefully remove the existing slate and inspect the roof decking.
Removing the slate back to the next good rafter. The roof slate is removed from next to the dormer out to the next good rafter. And from the apron flashing up to the dormer soffit / valley intersection. What is left of the old tin shingle flashing is pulled from under the dormer sidewall slate. The original tar paper is now mostly dust and is swept up with the debris.

Remove any old wall flashing from the roof and dormer sidewall.
A good picture of the old tin flashing that has rusted away on the opposite side of the dormer. After the slate next to the dormer was removed, it is almost possible to just brush the old tin flashing and tarpaper off the roof. Unfortunately, some of the tin flashing is up under the sidewall slate and it will take some manipulation and finesse to remove it without breaking any of the slate.

Inspect and remove any rotted or damaged roof decking.
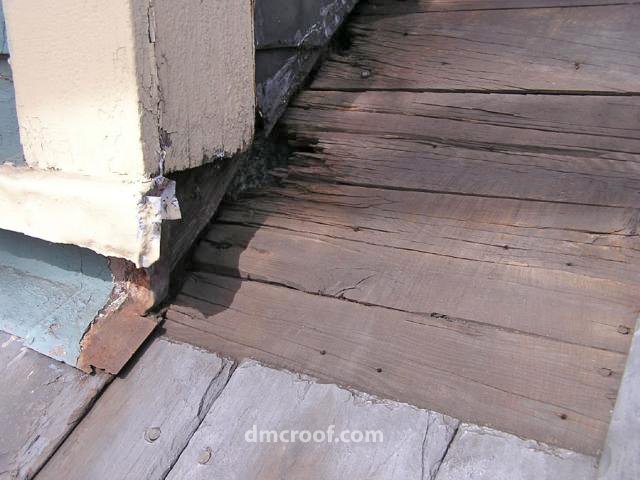
Years of slow, undetected leaking have rotted out the roof decking and rafters. The wood dormer trim has also been affected. The corner sill block has rotted away, and the front sill has been covered with sheet metal. Below the dormer, the apron flashing is also deteriorating.

Install new roof decking where necessary.
New rafters and decking installed. The old rotted rafter can be cut out with a reciprocating saw back to sound wood. It is then cut and notched to accept a new rafter piece.

Install new copper apron flashing on dormer front.
Copper apron straps ( thin strips of copper sheet metal about one-half inch wide by four inches long )are first fastened to the roof deck with copper nails. Then new copper apron flashing is fabricated to fit the dormer face and installed under the window sill. The straps are then bent over the apron and soldered in place, securing the apron flashing without nailing through the roofing slate.

Install new copper slate shingle and wall flashing.
New underlayment is slipped under the wall slate and applied to the roof deck. The old slate is reinstalled using inch-and-three-quarter copper slating nails. New copper shingle wall flashings are bent and installed between each slate course. It is a time-consuming and tedious task to wiggle and maneuver each flashing piece up and under the dormer side wall slate. The flashing is then nailed with a one-inch copper nail above the top of each slate.

Finished roof and dormer sidewall slate with new copper flashing.
A copper counter flashing is installed where the old corner sill block rotted away. The wood trim pieces will be replaced at a later date. After the other dormers, valleys, chimneys, etc., are repaired, and the budget allows. No tar was used for this slate roof repair.
